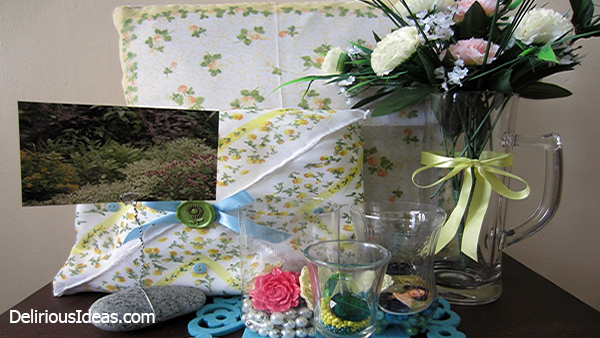
You look around your home and see that you’ve been using the same old boring décor for years. You then think to yourself, “Maybe it’s time for an update.” Well, you do want to redo your living room or probably any corner of your home but the problem is you don’t have the budget to buy new décor. For an instant home upgrade, the answer is simple: get crafty!
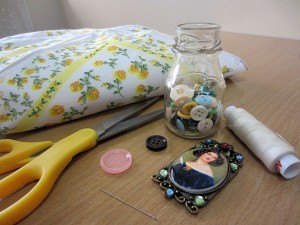 If you’re not really a Martha Stewart, don’t worry. In this post, we’ll feature five super easy do-it-yourself projects that are perfect even for the crafts-phobic. It’s time to pick up your scissors, some glue, and bits of odds and ends that are just lying around your home. Ready for some DIY? Let’s start!
Project #1: Plastic Bottle Table Accents
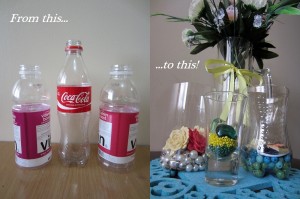 Materials needed: Old plastic bottles, a cutter or craft knife, small round and colourful items such as beads, pendants or pebbles
Here’s a great way to recycle plastic bottles: turn them into pretty table décor. Simply wash the bottles well then remove the plastic labels. Cut the bottles in your preferred height using a cutter. You can also cut along the lines or above the bottle’s curve. Finally, fill the bottle with some beads and pendants (which you can get from old or broken necklaces) or use small pebbles to decorate the bottom.
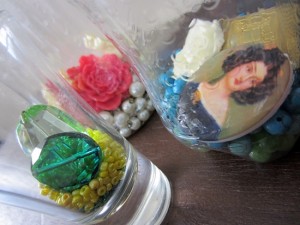
Final product!
TIP: You can also mix these bottle accents with beer mugs or other glassware to create homey table centrepieces as seen in the first photo.
Project #2: Plastic Bottle Vase
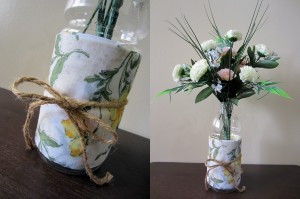 Materials needed: Fabric scraps or an old handkerchief, ribbon or twine
Glass vases are not the only ways to hold flowers. You can also use plastic bottles to do the job. To turn bottles into vases, just use ribbons, scraps of fabric or an old handkerchief to wrap the bottles. Secure the fabric with ribbon or gardener’s twine and place your favourite flowers in bunches or stalks of two or three.
Project #3: Stone Photo Holders
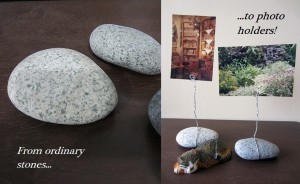
Simple yet elegant looking. Agree?
Materials needed: Loose stones, beader’s wire or industrial wire, wire cutter
Things you find outside your home or in the backyard can be made into décor such as loose stones. Simply gather smooth stones, preferably those with a flat base. Cut around 15 inches of wire (or longer if you prefer a taller photo holder). Wrap the wire under the stone and twist both ends together to form a long line but make sure one end is longer by around 2-3 inches. Curl the longer end to form a scroll. Lastly, place a photo or a postcard on the scroll. You now have a memory holder done in an instant!
Project #4: Handkerchief Pillowcases
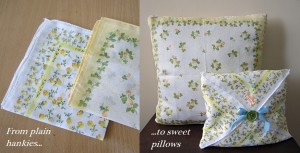
Materials needed: Old handkerchiefs, needle, thread, ribbons, buttons and other accents, fabric glue
If you don’t have old handkerchiefs, new ones will also do. In this feature, I made two kinds of pillowcases. The first handkerchief is used to cover a bigger throw pillow simply by sewing it on top of a plain white pillowcase.
For the second and smaller accent pillow, just lay the handkerchief flat on a table right side down. Grab the corners and sew the sides to form an envelope. Before sewing the last corner, insert a pillow inside and secure by sewing again. Add buttons, flat beads and ribbons by sewing or gluing to decorate.
Project #5: Cork-board Photo Frame
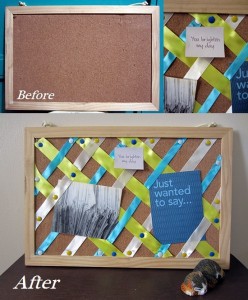 Materials needed: A cork-board ribbons in different colours thumb tacks
This is one of my favourite projects because it really doesn’t require any crafty skills. Just take a cork-board and lay strips of ribbon across the board in a diagonal fashion. You can use one colour or different colours of ribbons alternately. Secure the ends with thumb tacks and then tuck photos, mementos or postcards into the strips. It’s as easy as 1-2-3!
Special Project: Silkscreen Jewellery Holder
Materials needed: Old silkscreen, ribbons, necklaces, craft glue
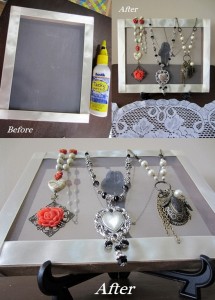
Looking bling!
This project doubles as a jewellery organizer and is perfect to decorate your room or vanity table. It’s also fairly easy to do. Use an old silk screen and glue ribbons in any colour you prefer at the borders and sides. Drape necklaces or hang earrings on the screen. You can hang the screen on a wall or place it on a plate holder. Now you can organize your jewellery in no time!
Decorating your home really doesn’t require a big budget; all you need are a few materials plus some extra time in your hands. What’s also great about creating your own décor is knowing that each piece is handmade with love, so keep your hands busy and start crafting!
Bonus tip: Try to get your whole family involved! Everyone (yes, even the young ones!) can have a part to play in crafting the DIY décors. In addition to having a new set of earth-friendly decorations, it is great for bonding as well. And if you’re really good at it, start giving some of them as gifts to your friends or even sell it online to generate a side income!
P.S. On a related note, do check out this other article of mine on decluttering your home!
