Once, twice or even thrice a week, bad hair days happen just like that! It’s even more inevitable if you live in a country where it’s always windy or humid. We can’t always have the perfect hair no matter what type of hair care routine we have. The most common solution would be an up-do, But let’s face it, the classic ponytail doesn’t really often satisfy our craving for style.

Presenting: The Bad Hair Day
What you need to do:
Here’s an easy bun that you can try on but trust that this is no ordinary bun where you just twist your hair around and then secure it with bobby pins. In this tutorial, we are going to do our best to make the “messy” (in a good way) bun up-do. Yes, you’ve seen your favorite k-pop stars sport the look and now is your chance to try it on.
All you need are a few house-hold items:
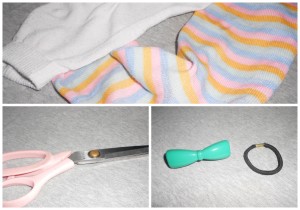
Just some ordinary household items
You would basically need 3 things, depending on the number of accessories you want to put on:
1. A sad sock that has lost it’s partner.
2. A pair of reliable scissors.
3. A rubberized tie for your hair and it could be in any color.
There are a few things you need to know first:
- The longer your hair is, the thicker your bun will be.
- If you have a longer sock, the effect would also be a thicker bun.
- It doesn’t matter what sock color you’re using because it’s going to be covered with hair.
Ready-set-BUN!
How to make the ‘donut’:
No, no, it’s not that kind of donut. This will be used to give shape to our bun and we are going to use the sock and the scissors for this. No baking needed.
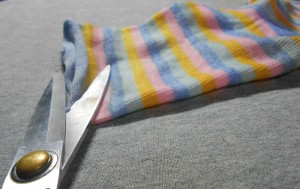
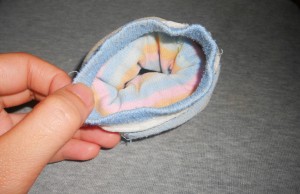
Cut the part of the sock where the toes go
So take your sock and cut off the part where the toes go. Roll the sock so it looks like this:
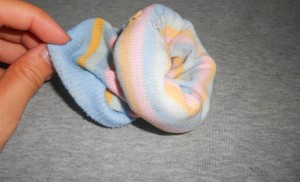
Tightly roll the sock to form the donut
Don’t role it all the way to the top because the end part will go over and under to make the bun tighter. Do this until almost everything looks neat and tucked in.
Do this step once or twice until the bun looks tight
For the next part, it would be fair to warn you that your arms are going to go through some burning sensations depending on how long you hold your hair up but it will all be worth it. You’ll nod in agreement later as you go through the process. So let’s start…
Step 1
Untangle your hair with a brush and tie it in a ponytail. The height of the ponytail will be where the bun is so make it higher if you want your bun to be so.
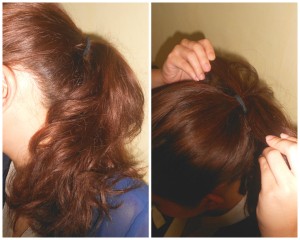
Tie your hair into a ponytail
Step 2
Take the donut and insert it your ponytail through it. The donut should be positioned near the tip, leaving just enough hair to cover it.
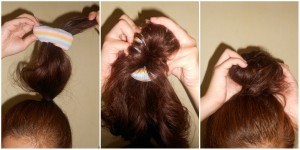
Roll your hair and tuck it inside the donut
Begin to arrange the tips of your hair around the bun to cover it. Don’t worry if it doesn’t look that covered yet.
Step 3
Now, like what you did to the sock, all you have to do is to tuck your hair inside the donut while rolling it downward. This may take a little while and it’s not going to look neat at first but just try your best to keep tucking and rolling inwards until you get to the base.
Step 4

Tidy the bun and make sure to tuck everything in
Once at the base, arrange everything so it looks neater. Remember that we don’t want something perfect since the look is called: messy bun.
Step 5
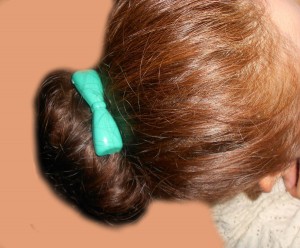
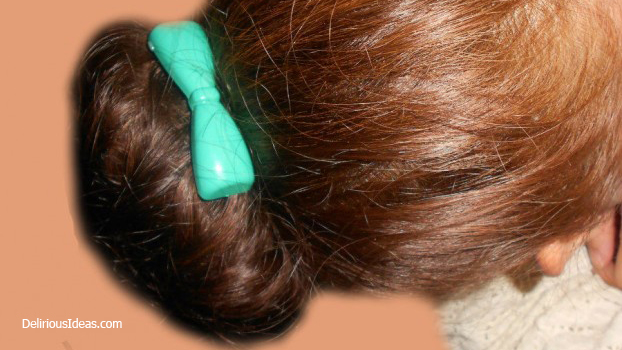
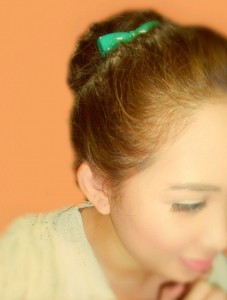
Top it off with some cute hair clips or pins
Put your hair accessories on, put on make-up if needed. Then you’re done!

Back of the hair bun
It’s a fun solution to days when you and your hair don’t understand each other. It may take a few practices but it’s always something fun to wear. Go try it for yourself!
By the way, on a hair-related note, do check out my Etude house bubble Dye ‘experiment’!


